GitHubを使ってみましょう(^^)
GitHubが無料でもプライベートが利用できるようになりました。
機能的には、ソース管理ができるだけなんですが、個人利用にはそれで十分。
てなわけで、早速使ってみました!
リポジトリを作ってみます。
※アカウントは、作っておいてくださいね(^^)
1)ログインします。
2)画面右上の「+」から”New repository”を選択するとこんな画面が表示されます。
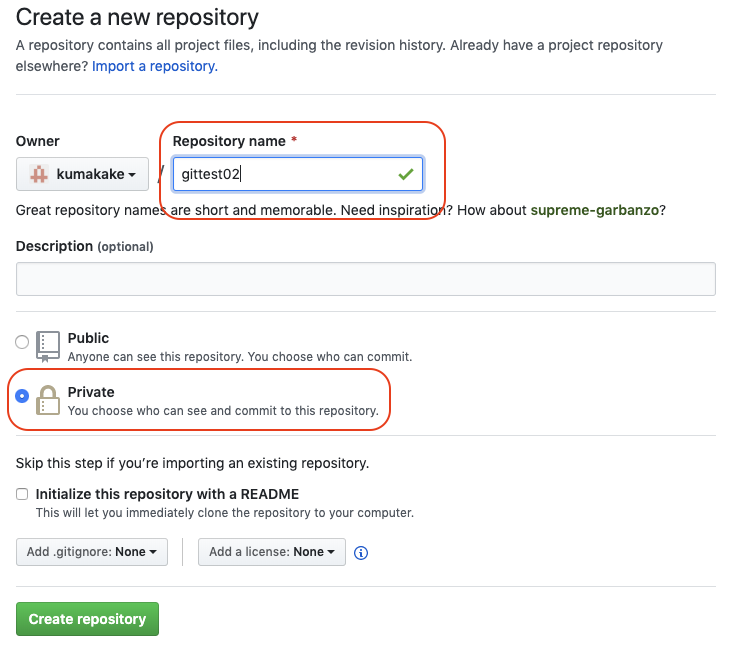
Repository nameを入力して、”Private”をチェックしてください。
”Initialize this repository with a README”をチェックすると、「Quick setup」の画面が表示されないので、私はチェックしないのをおすすめします。
”Create repository” をクリックすると、「Quick setup」画面が表示されます。
Quick setupをしてみましょう!
こんな画面が表示されます。
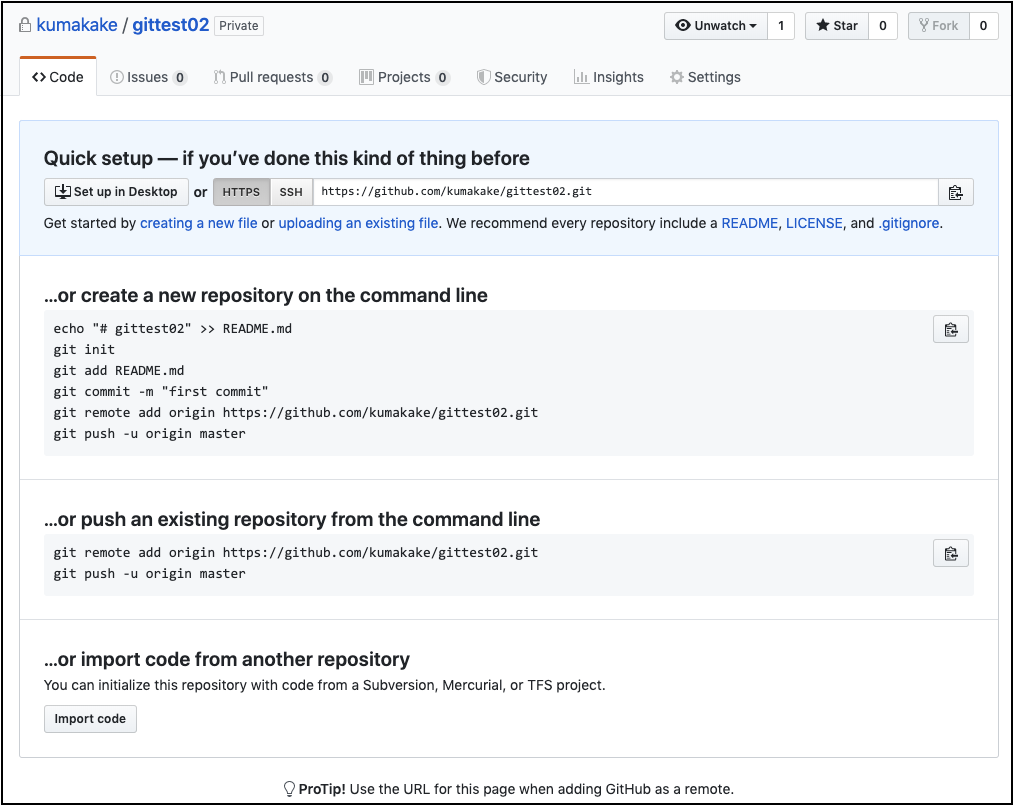
Quick setup — if you’ve done this kind of thing before
https://github.com/kumakake/gittest02.git
…or create a new repository on the command line
echo “# gittest02” >> README.md
git init
git add README.md
git commit -m “first commit”
git remote add origin https://github.com/kumakake/gittest02.git
git push -u origin master
…or push an existing repository from the command line
git remote add origin https://github.com/kumakake/gittest01.git
git push -u origin master
…or import code from another repository
You can initialize this repository with code from a Subversion, Mercurial, or TFS project.
この説明画面は、最初のpushがされると、ファイルの一覧画面に変わります。
てなことで、pushしてみましょう!
手順に沿って、処理をすれば、最初のプッシュがされます。
Dockerを使いだして、他のPCとソース共有をするためにGithubを使い始めました。
めんどくさいことはそうなんですが、ちょっとは文明に追いついたのかなって感じですww