JitsiにEtherpadをインストールしました。
今回、新規にサーバーを準備した理由の一つ、共有ドキュメントサービス「Etherpad」のインストール手順です。
一番悩んだのが、MySQLを使うケースと使わないケースの記事に出会ったことです。
どちらが正しいのか。。。
ただ、MySQL使ったら記録もできるんだろ〜なんて考えて、MySQLを使った手順でインストールをしました。
ところで「インストール」「セットアップ」の違いは?
今回は「インストール」と表現をしていますが、「セットアップ」ってのもあります。
これらの違いってのは???
わたしは、だいたいインストールを使うのですが、調べてみました。
どうやら
セットアップ:PCなどを正常に動作するように環境整備(OS含む)をすること。
インストール:セットアップされた環境にソフトウェアを使える状況まですること。
な感じのようです。
「PCセットアップして、オフィスをインストールしといて!」となる・・・かな(^^;
Etherpadをインストールしましょう!
参考:https://gist.github.com/facsiaginsa/c1f45a359adefabe71f748d9894a22bb
1)etherpadをクローンする
# cd /usr/share
# git clone –branch master https://github.com/ether/etherpad-lite.git etherpad
2)etherpadユーザーを作成する
# adduser etherpad
パスワード: *******
3)ディレクトリ etherpad の権限を変更する
# chown -R etherpad:etherpad etherpad
# chmod -R 744 etherpad
4)dbにetherpad用のDBとユーザーを作成する
ユーザー名: etherpaduser
パスワード: *****
DB名 : etherpad_lite_db
> CREATE DATABASE etherpad_lite_db;
> CREATE USER ‘etherpaduser’@’localhost’ IDENTIFIED BY ‘mQYSmiQqyA8i’;
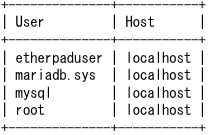
> select user,host from mysql.user;
> GRANT ALL ON etherpad_lite_db.* TO ‘etherpaduser’@’localhost’;
> FLUSH PRIVILEGES;
> SHOW GRANTS FOR ‘etherpaduser’@’localhost’;
5)Configを調整する
# cd etherpad
# npm install pm2 -g
found 0 vulnerabilities
npm notice
npm notice New major version of npm available! 8.19.3 -> 9.4.1
npm notice Changelog: https://github.com/npm/cli/releases/tag/v9.4.1
npm notice Run npm install -g npm@9.4.1 to update!
npm notice
参考:https://github.com/Unitech/pm2
# npm install -g npm@9.4.1
# npm -v
9.4.1
・setting.json.templete を setthing.jsonにする
# cp settings.json.template settings.json
・setting.jsonでDB設定のコメントを外して編集する
“dbType” : “mysql”,
”dbSettings” : {
”user”: “etherpaduser”,
”host”: “localhost”,
”port”: 3306,
”password”: “********”,
”database”: “etherpad_lite_db”,
”charset”: “utf8mb4”
},
6)環境変数を追加する
・/etc/environment
追加
NODE_ENV=production
7)起動スクリプトを編集する
・bin/run.sh
#exec node src/node/server.js “$@”
SCRIPTPATH=”/usr/share/etherpad”
exec pm2 start “$SCRIPTPATH/node_modules/ep_etherpad-lite/node/server.js” “$@”
8)起動する
# su – etherpad
$ cd /usr/share/etherpad
$ bin/run.sh
:
:
[PM2] Starting /usr/share/etherpad/node_modules/ep_etherpad-lite/node/server.js in fork_mode (1 instance)
[PM2] Done.
$ ss -nltup | grep 9001
tcp LISTEN 0 511 0.0.0.0:9001 0.0.0.0:* users:((“node /usr/share”,pid=13610,fd=28))
9)nginxの設定をし、再起動する。
・/etc/nginx/sites-available/bbb.kumapress.com.conf
下記を追加
# Etherpad Integration
location ^~ /etherpad/ {
proxy_pass http://localhost:9001/;
proxy_set_header X-Forwarded-For $remote_addr;
proxy_buffering off;
proxy_set_header ost $host;
}
$ sudo systemctl restart nginx
10)Jitsiのconfigを編集
・/etc/jitsi/meet/bbb.kumapress.com-config.js
etherpad_base: ‘https://bbb.kumapress.com/etherpad/p/’,
11)確認する
etherpad が実行され、jitsi と統合されていることを確認するには、カンファレンス ルームを作成し、右下隅のメニューを開きます。
「共有ドキュメントを開く」メニューがあるはずです。それをクリックすると、etherpad ドキュメントが開きます
12)プロセスの再起動設定
サーバーが再起動した場合、pm2で管理しているサービスを再起動させます。
・機能プロセスを自動生成します。
※起動ユーザーは作成したユーザーで生成されます。
$ pm2 startup
[PM2] Init System found: systemd
[PM2] To setup the Startup Script, copy/paste the following command:
sudo env PATH=$PATH:/usr/bin /usr/lib/node_modules/pm2/bin/pm2 startup systemd -u etherpad –hp /home/etherpad
・作成されたコマンドを実行します。
$ sudo env PATH=$PATH:/usr/bin /usr/lib/node_modules/pm2/bin/pm2 startup systemd -u etherpad –hp /home/etherpad
[PM2] Init System found: systemd
Platform systemd
Template
[Unit]
Description=PM2 process manager
Documentation=https://pm2.keymetrics.io/
After=network.target
[Service]
Type=forking
User=etherpad
LimitNOFILE=infinity
LimitNPROC=infinity
LimitCORE=infinity
Environment=PATH=/usr/local/sbin:/usr/local/bin:/usr/sbin:/usr/bin:/sbin:/bin:/usr/games:/usr/local/games:/snap/bin:/usr/bin:/bin:/usr/local/sbin:/usr/local/bin:/usr/sbin:/usr/bin
Environment=PM2_HOME=/home/etherpad/.pm2
PIDFile=/home/etherpad/.pm2/pm2.pid
Restart=on-failure
ExecStart=/usr/lib/node_modules/pm2/bin/pm2 resurrect
ExecReload=/usr/lib/node_modules/pm2/bin/pm2 reload all
ExecStop=/usr/lib/node_modules/pm2/bin/pm2 kill
[Install]
WantedBy=multi-user.target
Target path
/etc/systemd/system/pm2-etherpad.service
Command list
[ ‘systemctl enable pm2-etherpad’ ]
[PM2] Writing init configuration in /etc/systemd/system/pm2-etherpad.service
[PM2] Making script booting at startup…
[PM2] [-] Executing: systemctl enable pm2-etherpad…
Created symlink /etc/systemd/system/multi-user.target.wants/pm2-etherpad.service → /etc/systemd/system/pm2-etherpad.service.
[PM2] [v] Command successfully executed.
+—————————————+
[PM2] Freeze a process list on reboot via:
$ pm2 save
[PM2] Remove init script via:
$ pm2 unstartup systemd
13)プロセスの起動確認
pm2を利用することで状況が表示できます。
$ pm2 ls

参考:https://pm2.keymetrics.io/docs/usage/quick-start/
https://github.com/Unitech/pm2
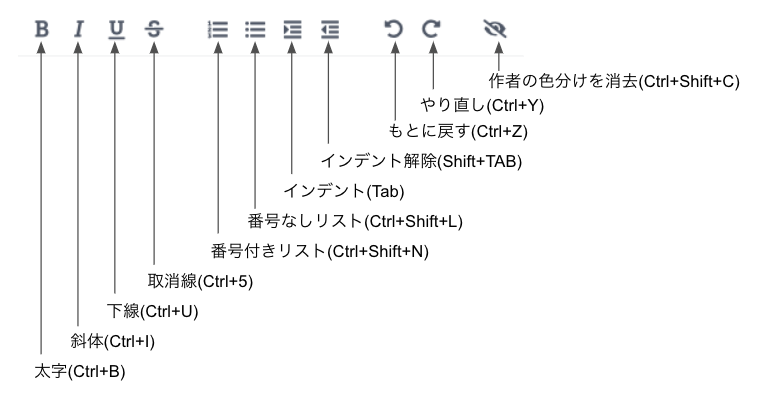
Jitsiメニューに追加されます

共有ドキュメントのメニュー